Get Started
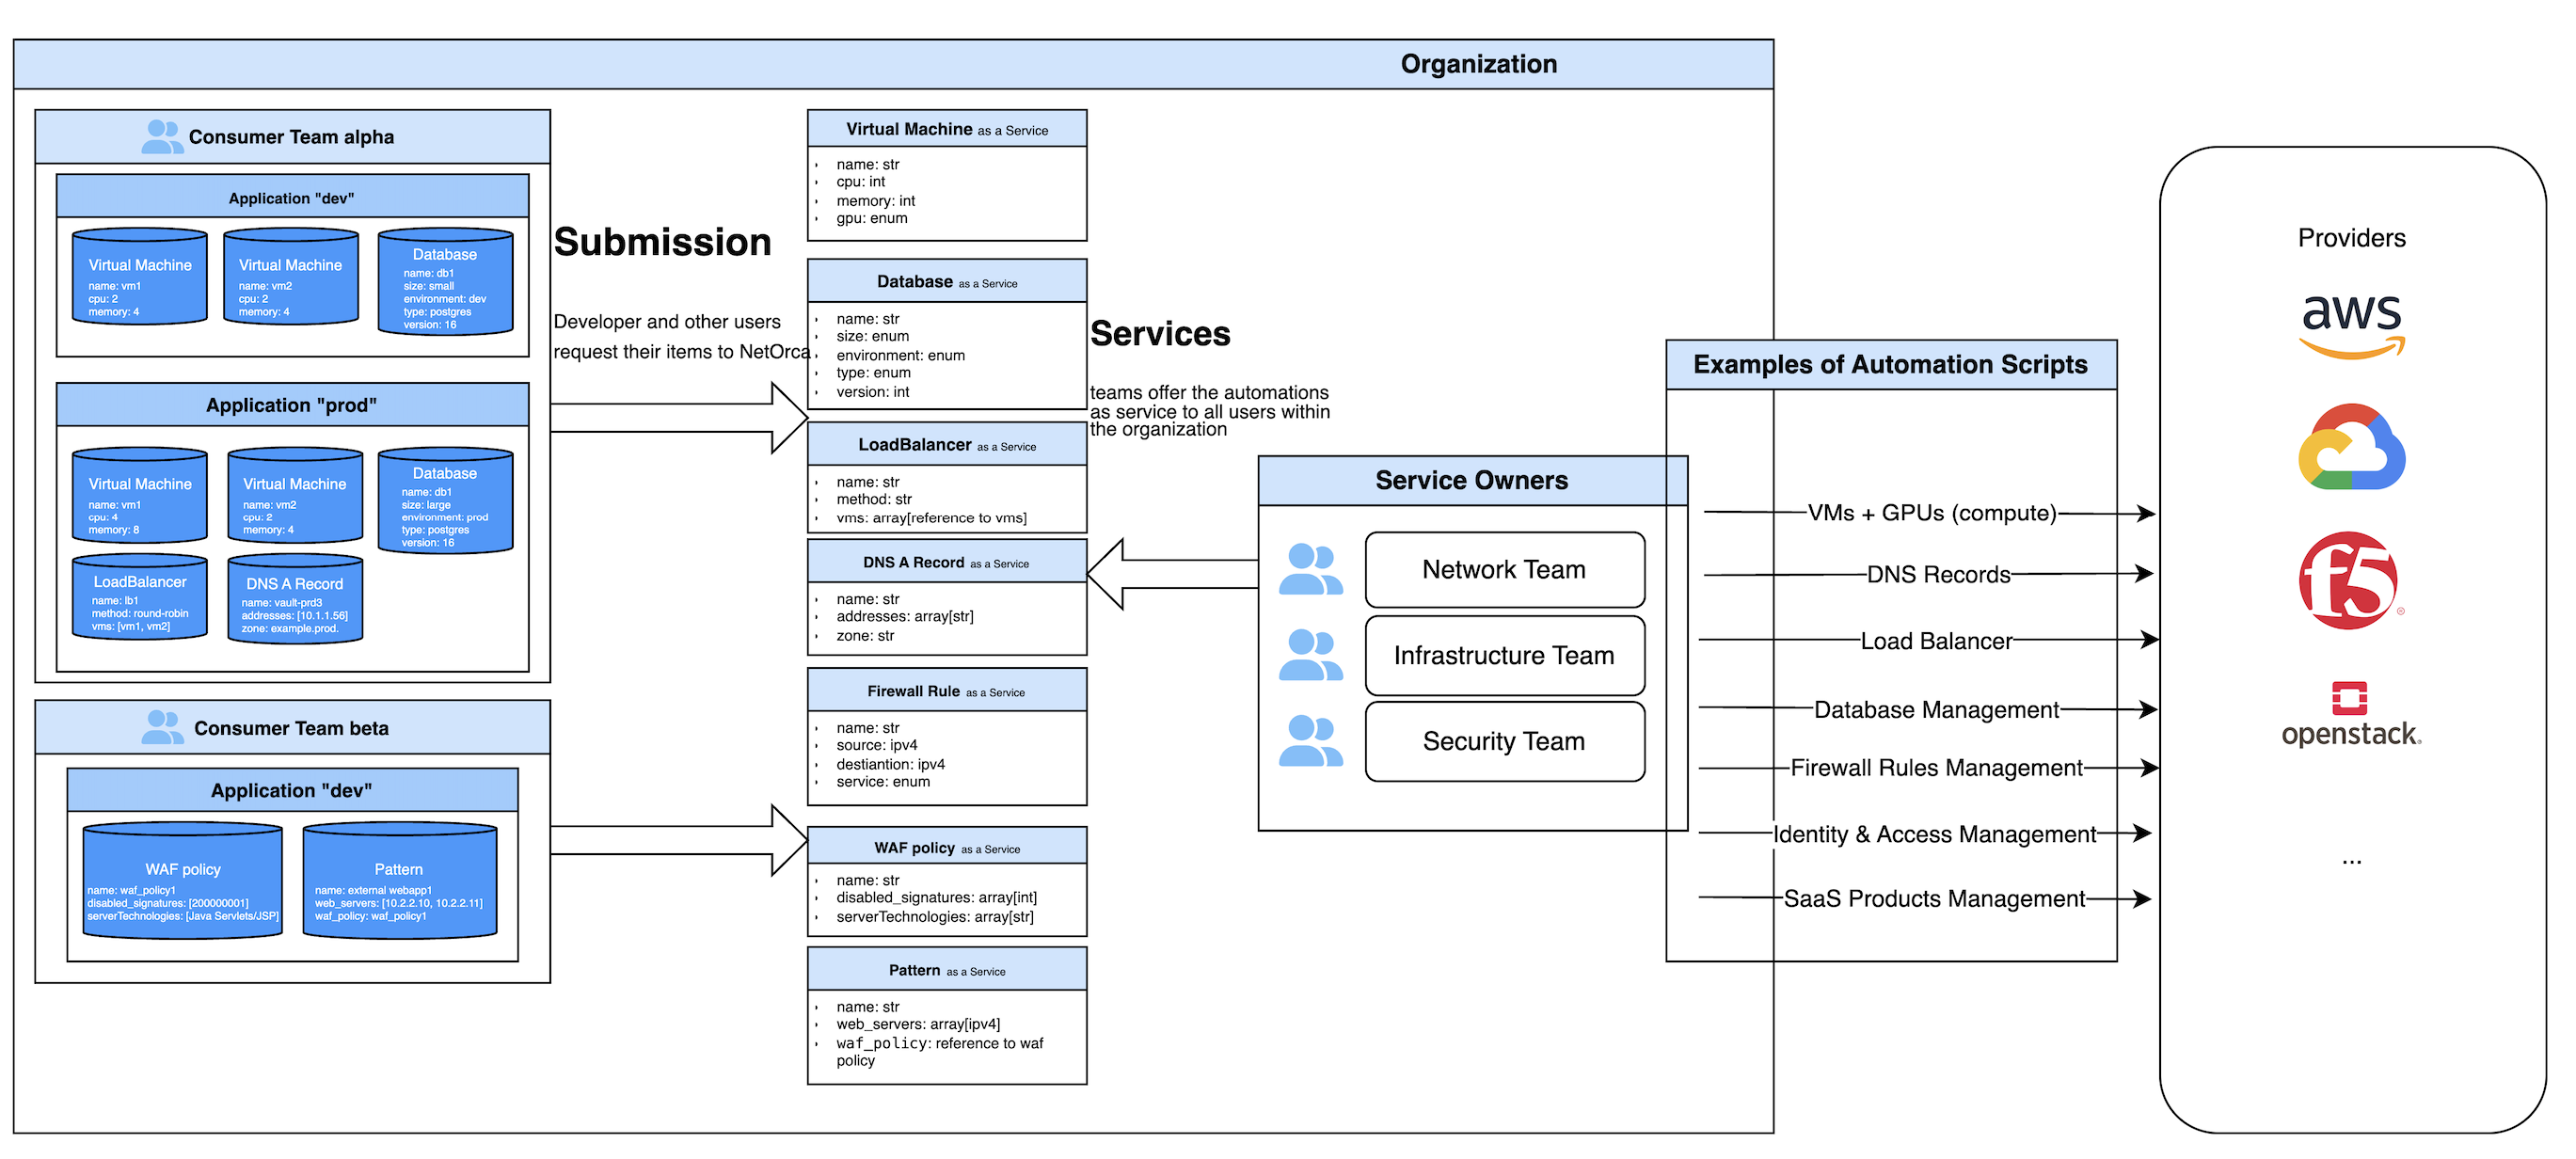
NetOrca is a platform that connects Service Owners -- the teams that build and maintain infrastructure automation -- with Consumers -- the teams that need those infrastructure resources. It standardizes how services are defined, requested, and delivered across your organization.
This guide walks you through the end-to-end workflow: defining a service, requesting resources, and processing changes.
How It Works
NetOrca operates on a declarative model with three core steps:
flowchart LR
    A["<b>1. Define</b><br/>Service Owner creates<br/>a Service Schema"] --> B["<b>2. Request</b><br/>Consumer submits<br/>a Declaration"]
    B --> C["<b>3. Deliver</b><br/>Change Instances are<br/>generated and processed"]
C -->|Consumer updates| B- Service Owners publish a JSON Schema for each service they offer (e.g., Virtual Machines, DNS Records, Firewall Rules). This schema defines what inputs consumers need to provide.
- Consumers submit a declaration -- a structured YAML/JSON file describing the resources they need, with all the details required by the schema.
- NetOrca compares each new declaration against the previous one, generates Change Instances for any differences, and routes them to the responsible Service Owner for processing.
This cycle repeats every time a consumer updates their declaration, giving both sides a clear, auditable record of every change.
Step 1: Define a Service (Service Owner)
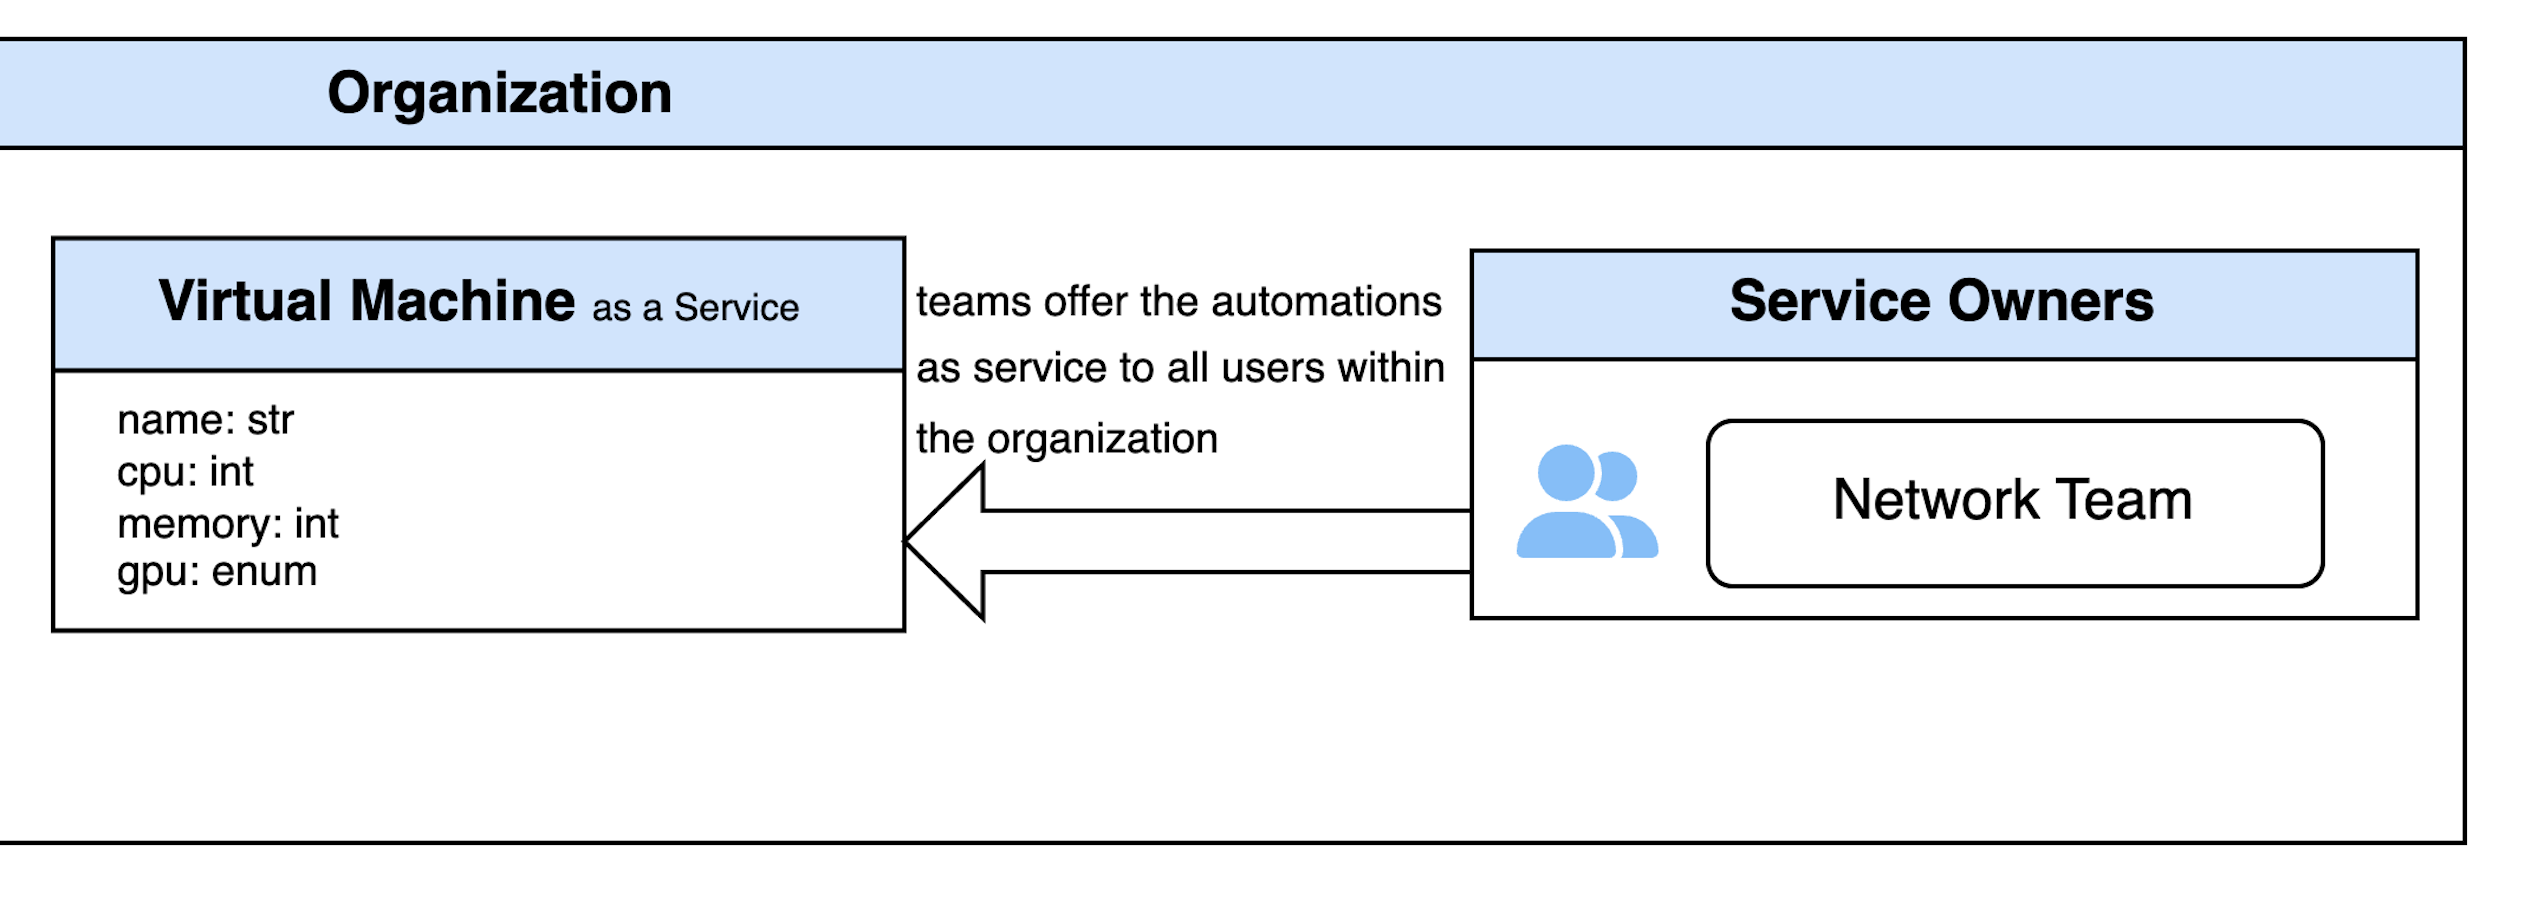
Service Owners formalize their automation by creating a Service Schema -- a JSON Schema that describes the inputs a consumer must provide. Once submitted to NetOrca, the service appears in the catalog for consumers to use.
1.1 Set Up a Git Repository
Managing Service Schemas through Git gives you version control, peer review via merge requests, and automated submission through CI/CD -- so every schema change is tracked and auditable. NetOrca provides ready-to-use CI/CD scripts that validate and submit schemas automatically on push.
Clone the Service Owner Template to get started:
1.2 Configure the Repository
The config.json file points to your NetOrca instance:
1.3 Create the Service Schema
Define your service by creating a JSON Schema file named after the service (e.g., VirtualMachine.json). The schema specifies the fields consumers must fill in, their types, and any constraints.
Here is an example for a Virtual Machine service:
File:
VirtualMachine.json
{
  "title": "Virtual Machine",
  "description": "Schema of a Virtual Machine",
  "type": "object",
  "properties": {
    "name": {
      "type": "string",
      "examples": ["CoreVM1"]
    },
    "cpu": {
      "type": "integer",
      "description": "Number of CPU cores",
      "examples": [4, 8]
    },
    "memory": {
      "type": "integer",
      "description": "Memory in GB",
      "examples": [4, 8, 16]
    },
    "gpu": {
      "type": "string",
      "description": "Type of GPU",
      "enum": ["gpu1", "gpu2"]
    }
  },
  "required": ["name", "cpu", "memory"]
}
For the full specification of supported schema features, see Service Definition.
1.4 Submit via CI/CD
The included .gitlab-ci.yml script handles validation and submission automatically:
- Create a team in NetOrca. Each team maps to exactly one repository (1:1 relationship).
- Generate an API key for the team -- see Team Management.
- Add the
NETORCA_API_KEYenvironment variable to your CI/CD pipeline settings. - Push to the main branch. The CI/CD script validates and submits the schema to NetOrca.
See also: Service Definition | Service Settings | Service Owner GitOps
Step 2: Request Services (Consumer)
Consumers select the services they need and provide the required details in a Submission Declaration -- a YAML or JSON file that describes the desired state of all their resources.
NetOrca uses a declarative model: every submission must include the complete desired state, not just the changes. NetOrca compares it against the previous submission and automatically detects what has been created, modified, or removed.
Consumers can submit their declarations through the GUI or a GitOps workflow.
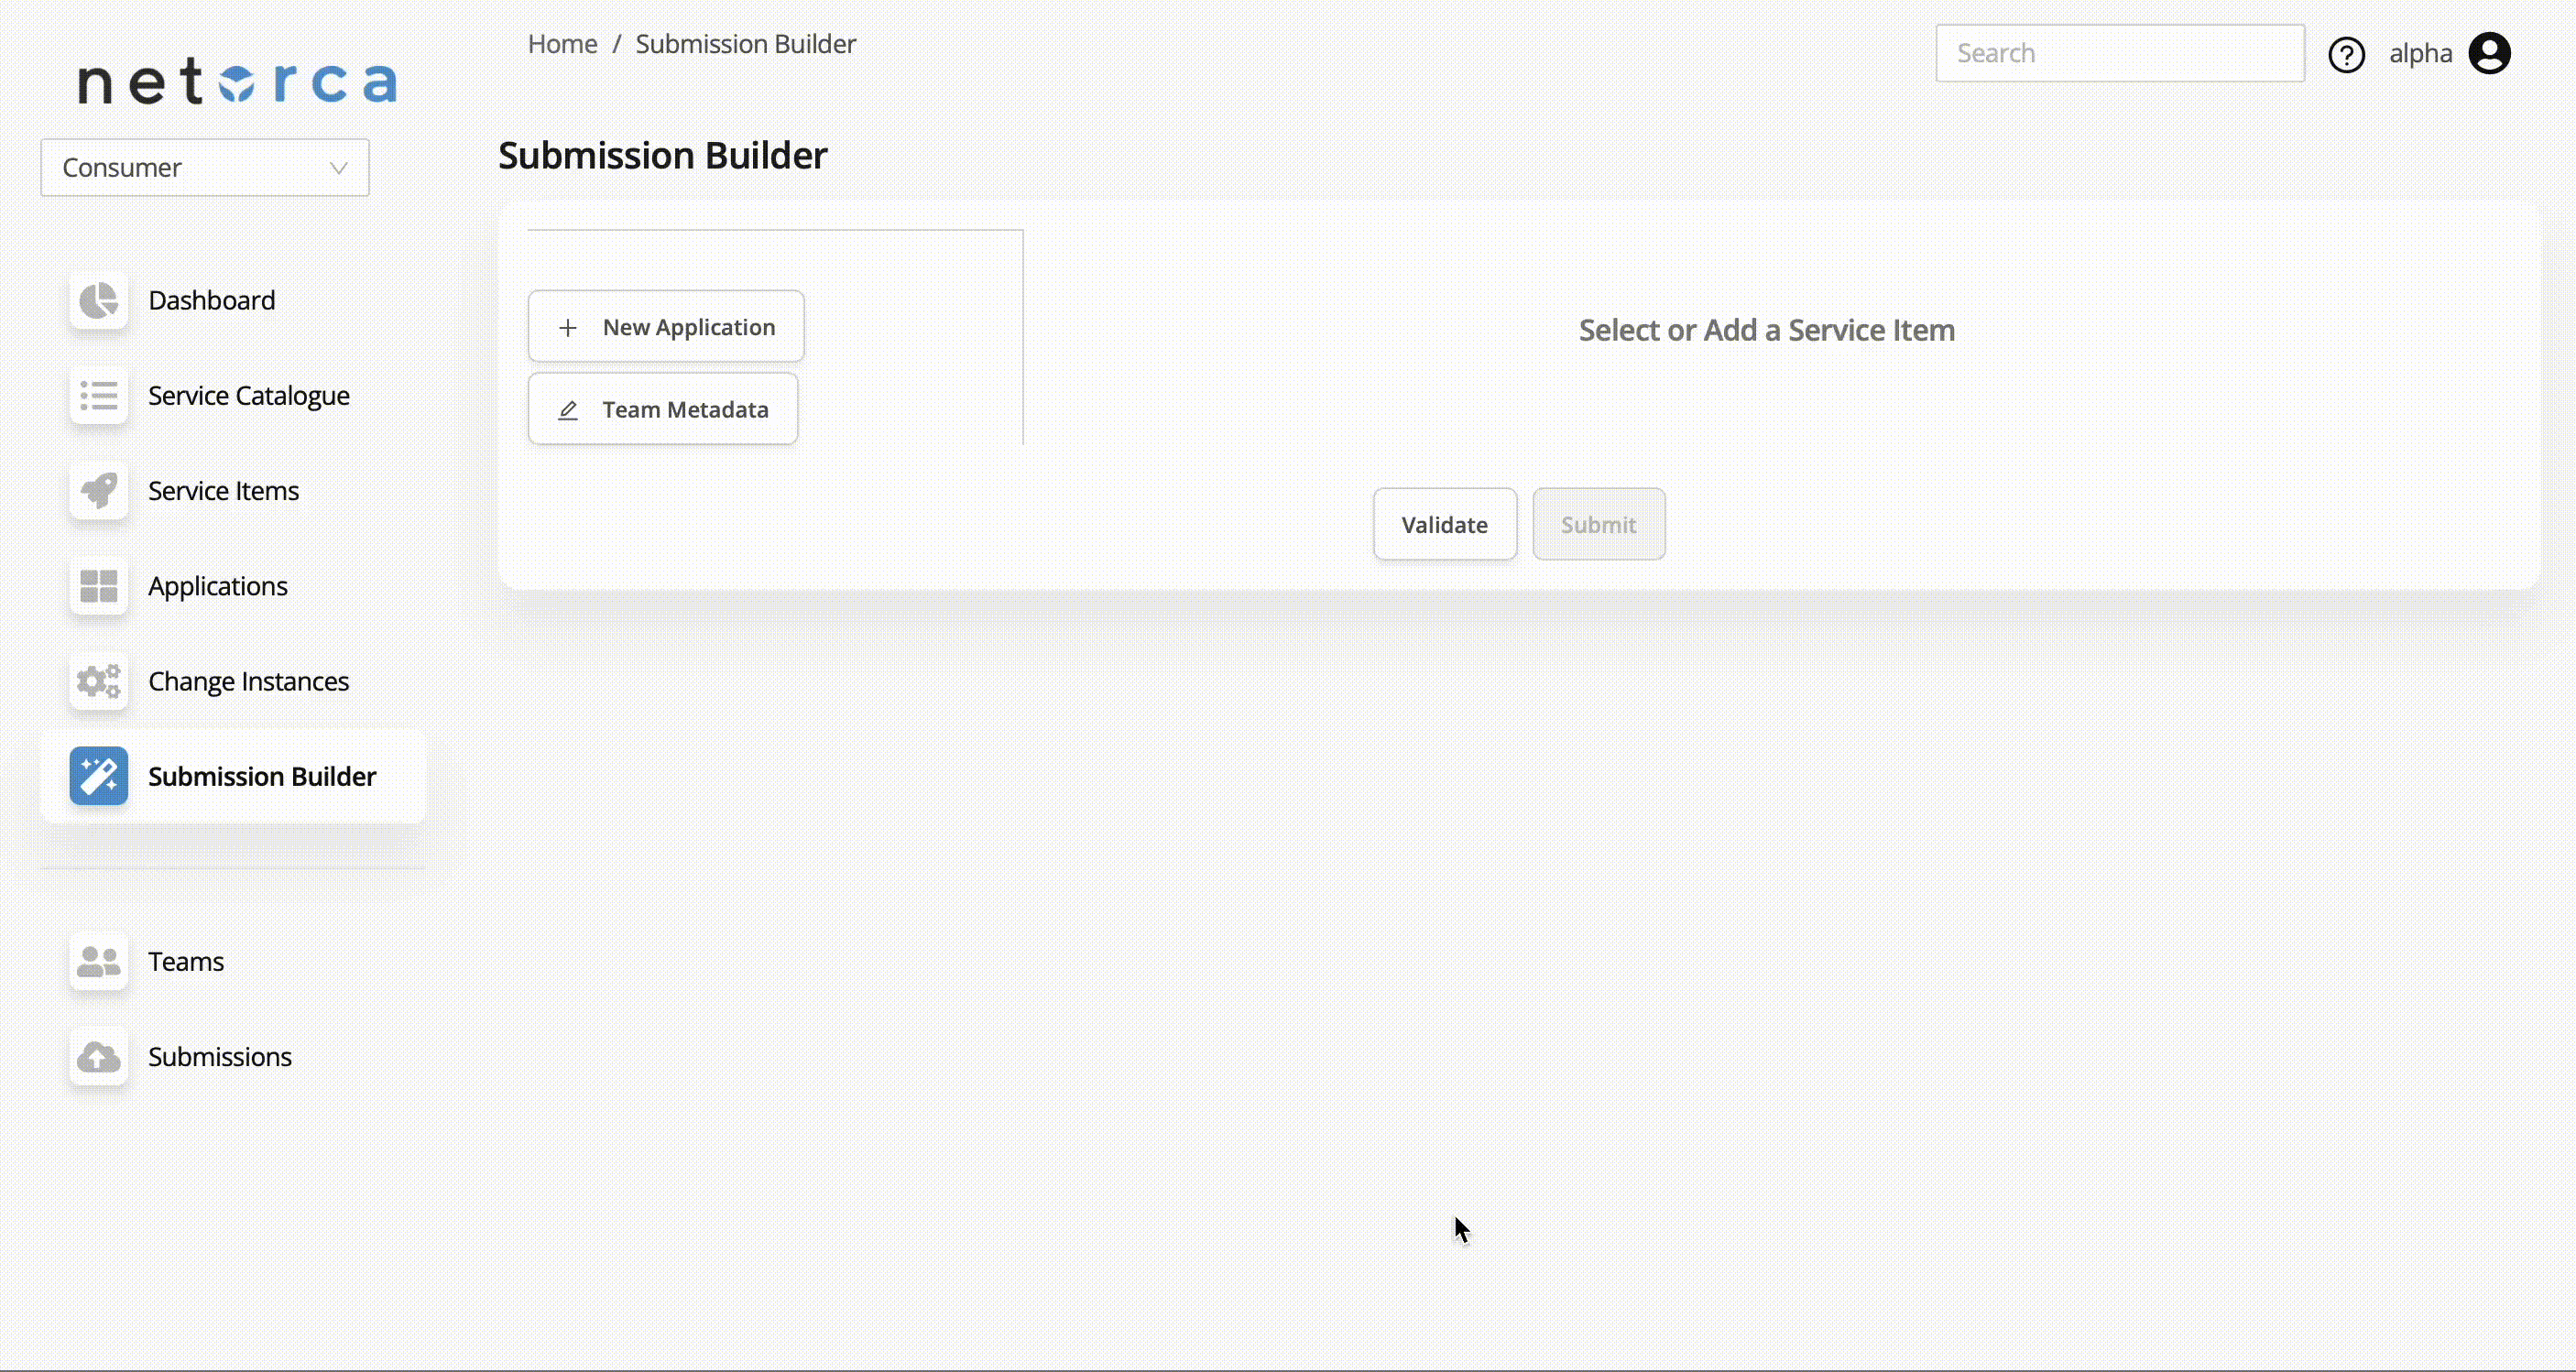
Option A: Submission Builder (GUI)
The NetOrca GUI provides a Submission Builder where consumers can visually build and submit their declarations:
Option B: GitOps Workflow
For teams that prefer code-driven workflows, managing declarations in Git provides version history, peer review on every change, and automated submission via CI/CD.
2.1 Set Up a Git Repository
Clone the Consumer Template:
2.2 Configure the Repository
The config.yaml file contains the NetOrca endpoint and team metadata:
---
netorca_global:
  base_url: https://api.netorca.io/v1
  metadata:
    budget_code: 12345
    team_name: alpha
2.3 Create a Submission Declaration
Create a YAML file for each application (e.g., dev.yaml). Inside, list the service items you need under their service type:
File:
dev.yaml
A single repository can contain multiple application files. For the full declaration structure, see Submission.
2.4 Submit via CI/CD
With the included .gitlab-ci.yml, every push to the default branch automatically submits the declaration to NetOrca.
See also: Submission | Consumer GitOps
Step 3: Process Change Instances
When a consumer submits a declaration, NetOrca compares it with the previous version and generates a Change Instance for each created, modified, or deleted resource. These Change Instances are then routed to the responsible Service Owner.
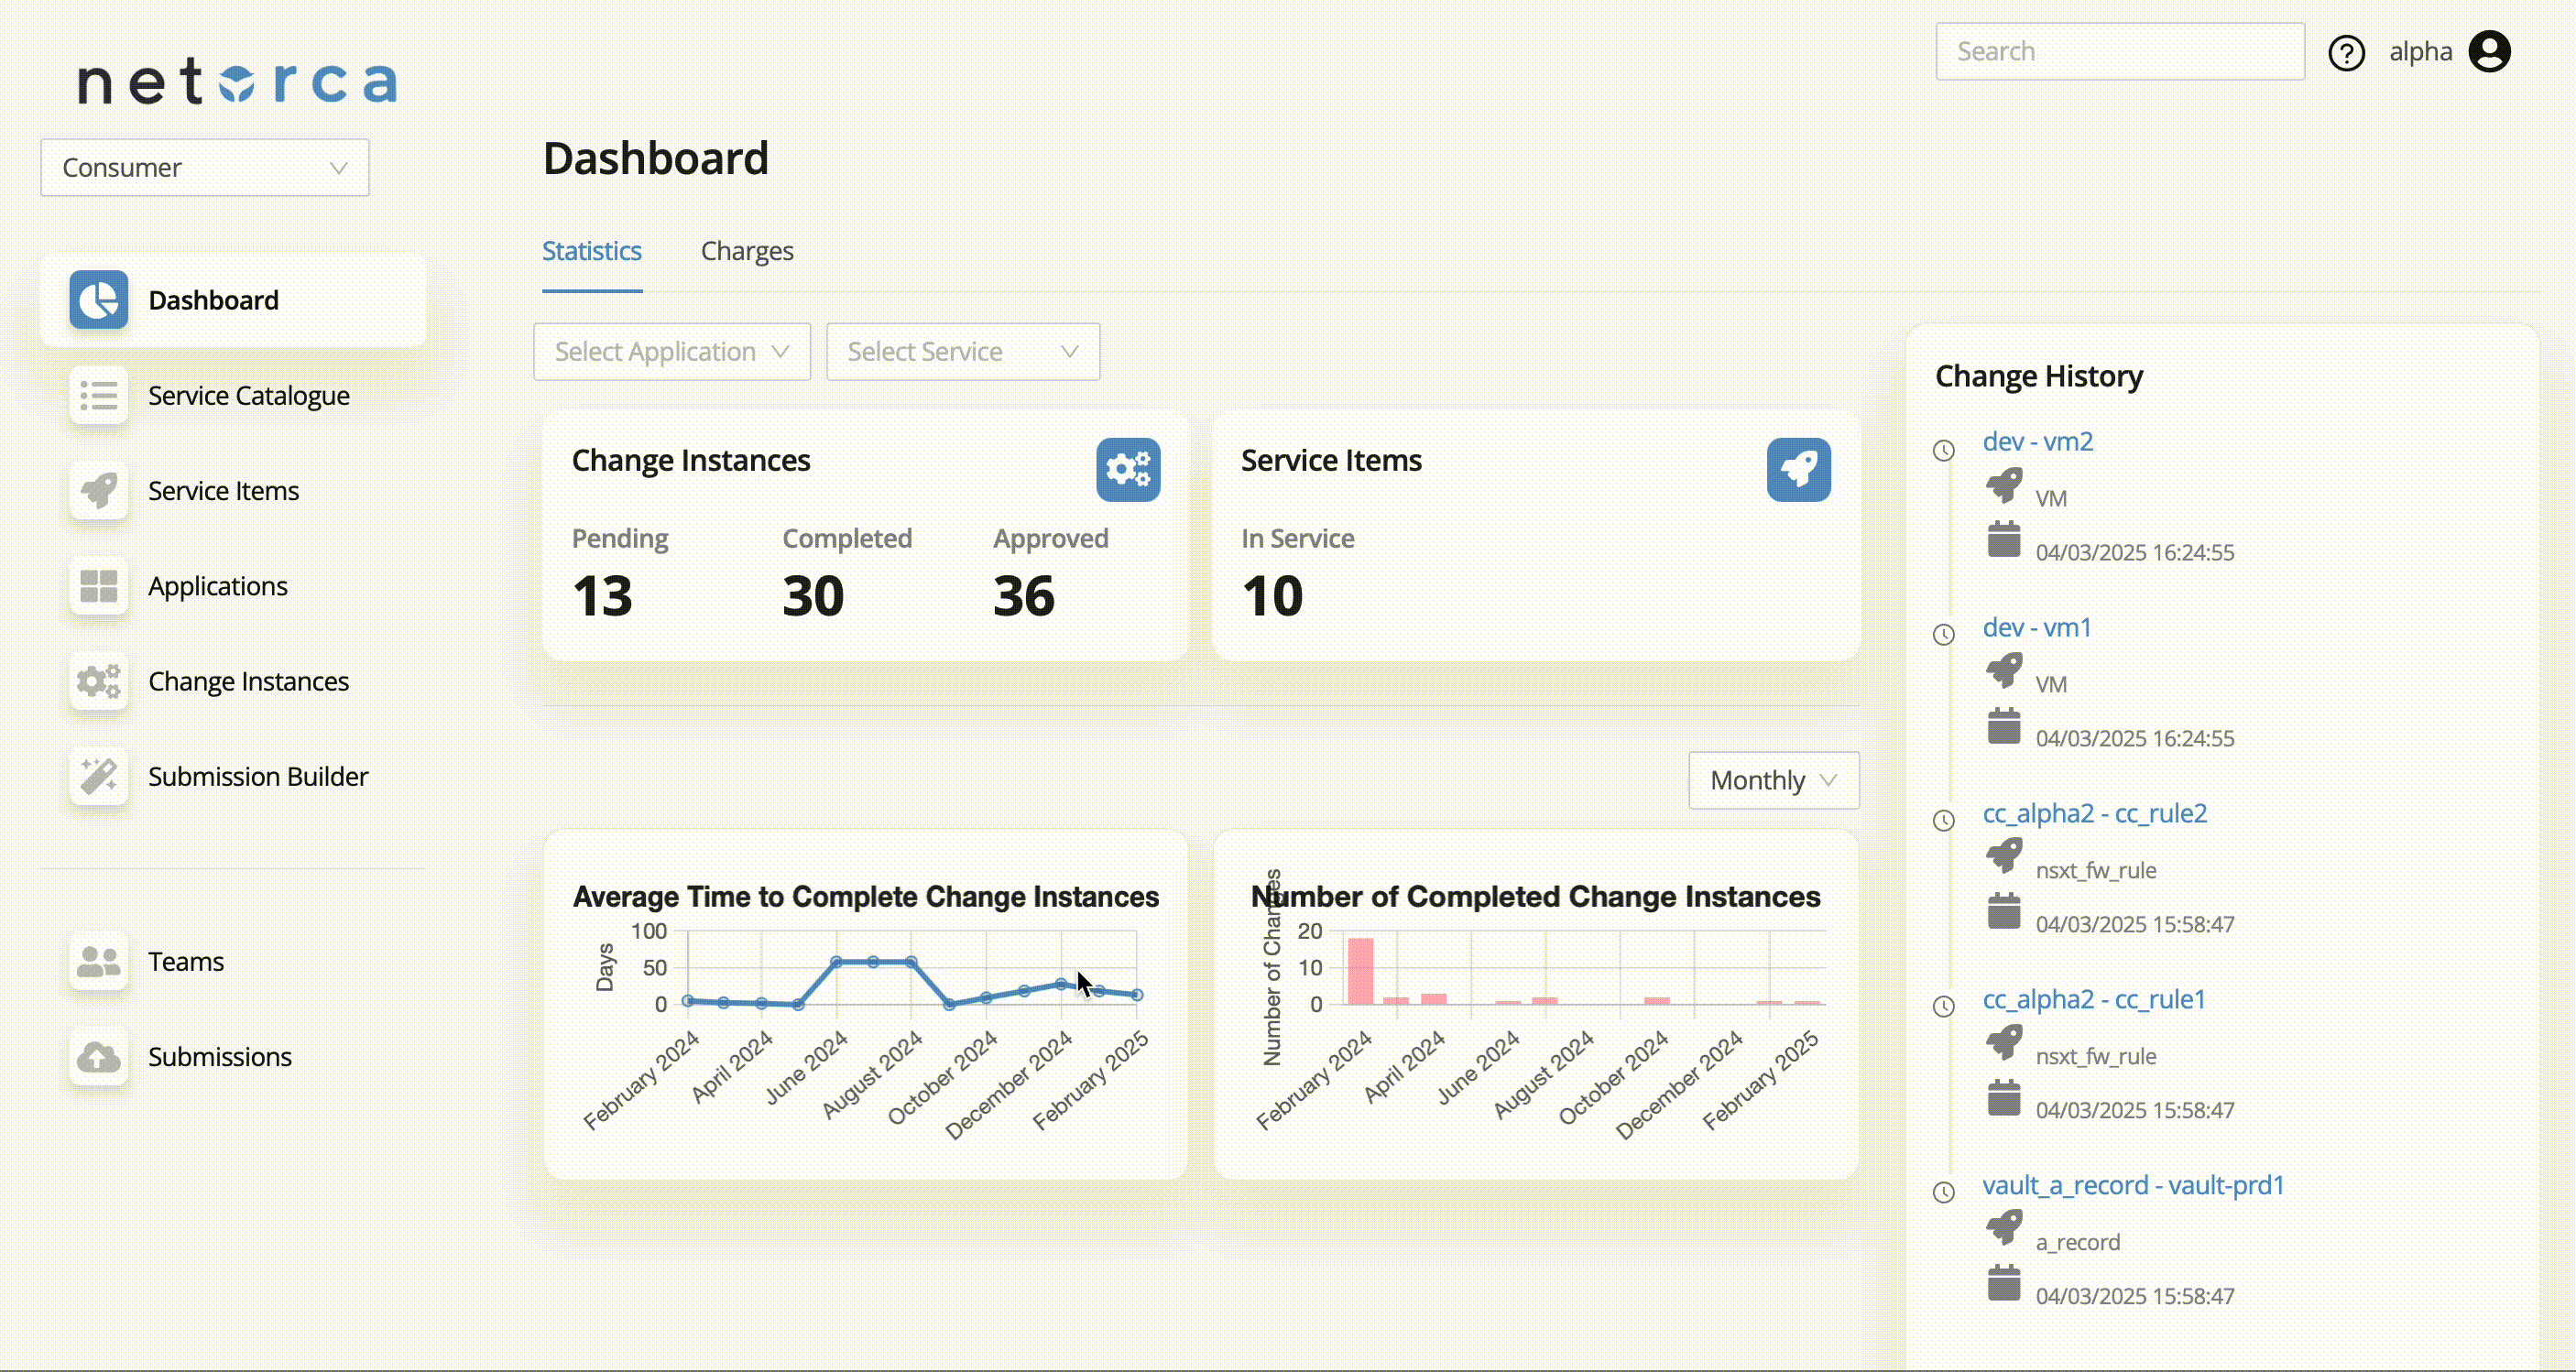
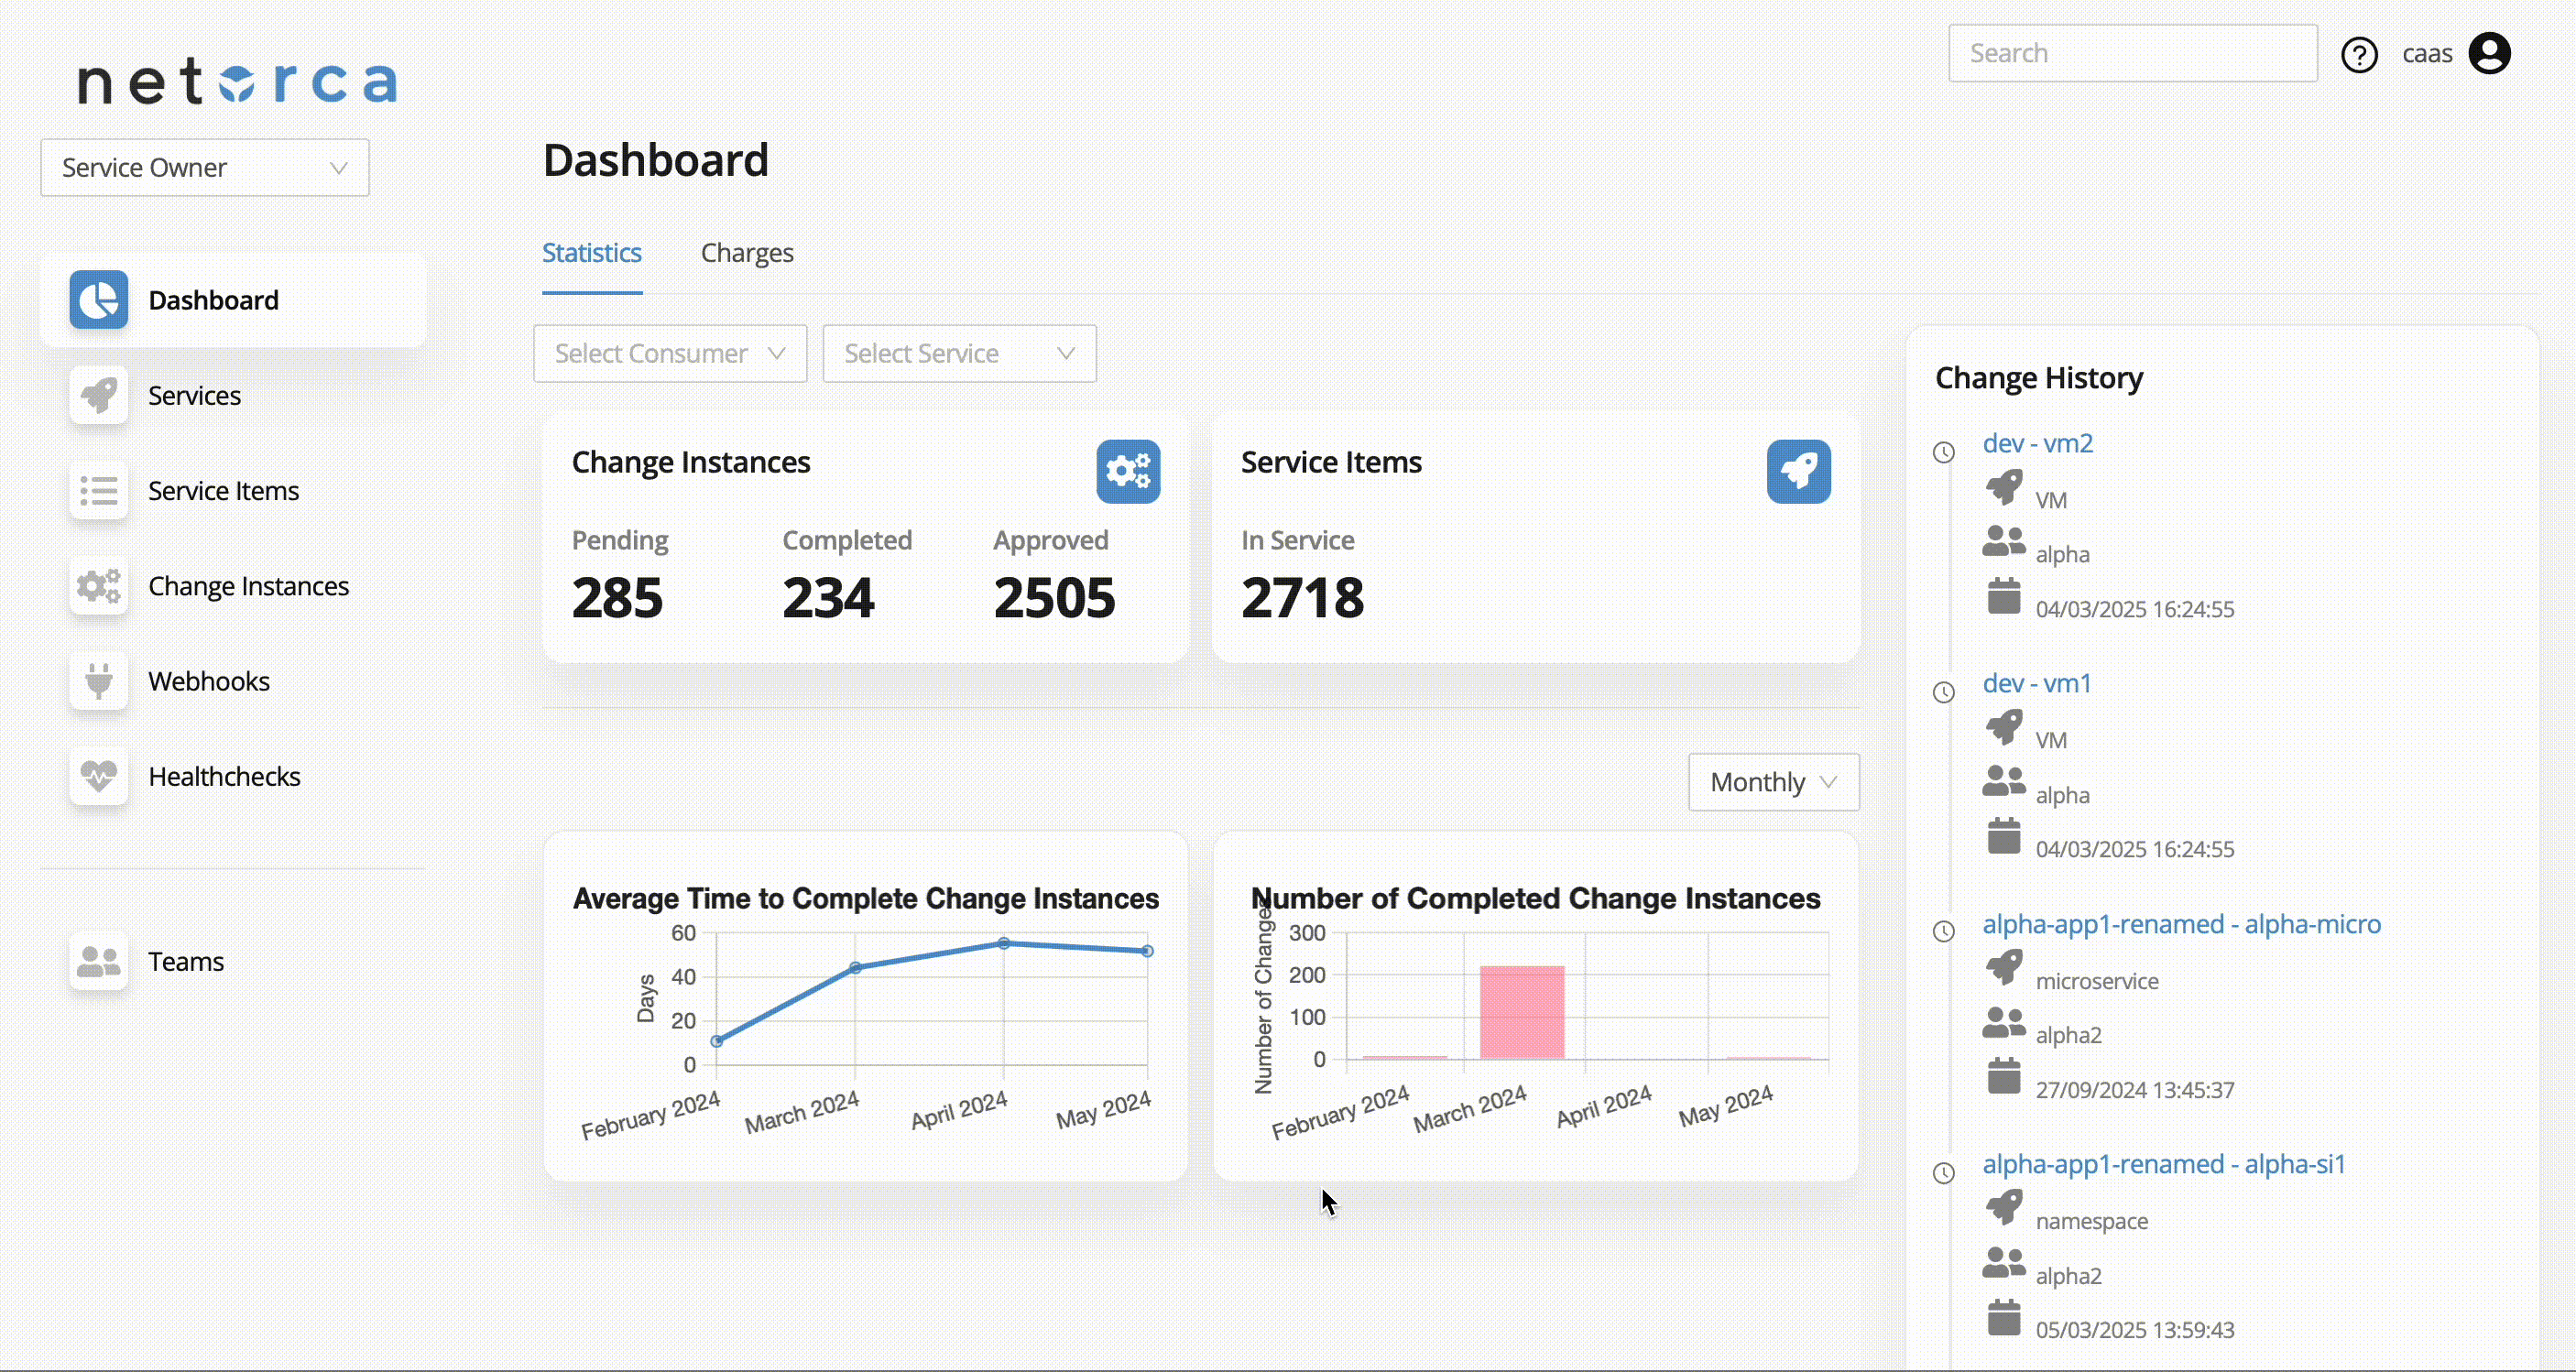
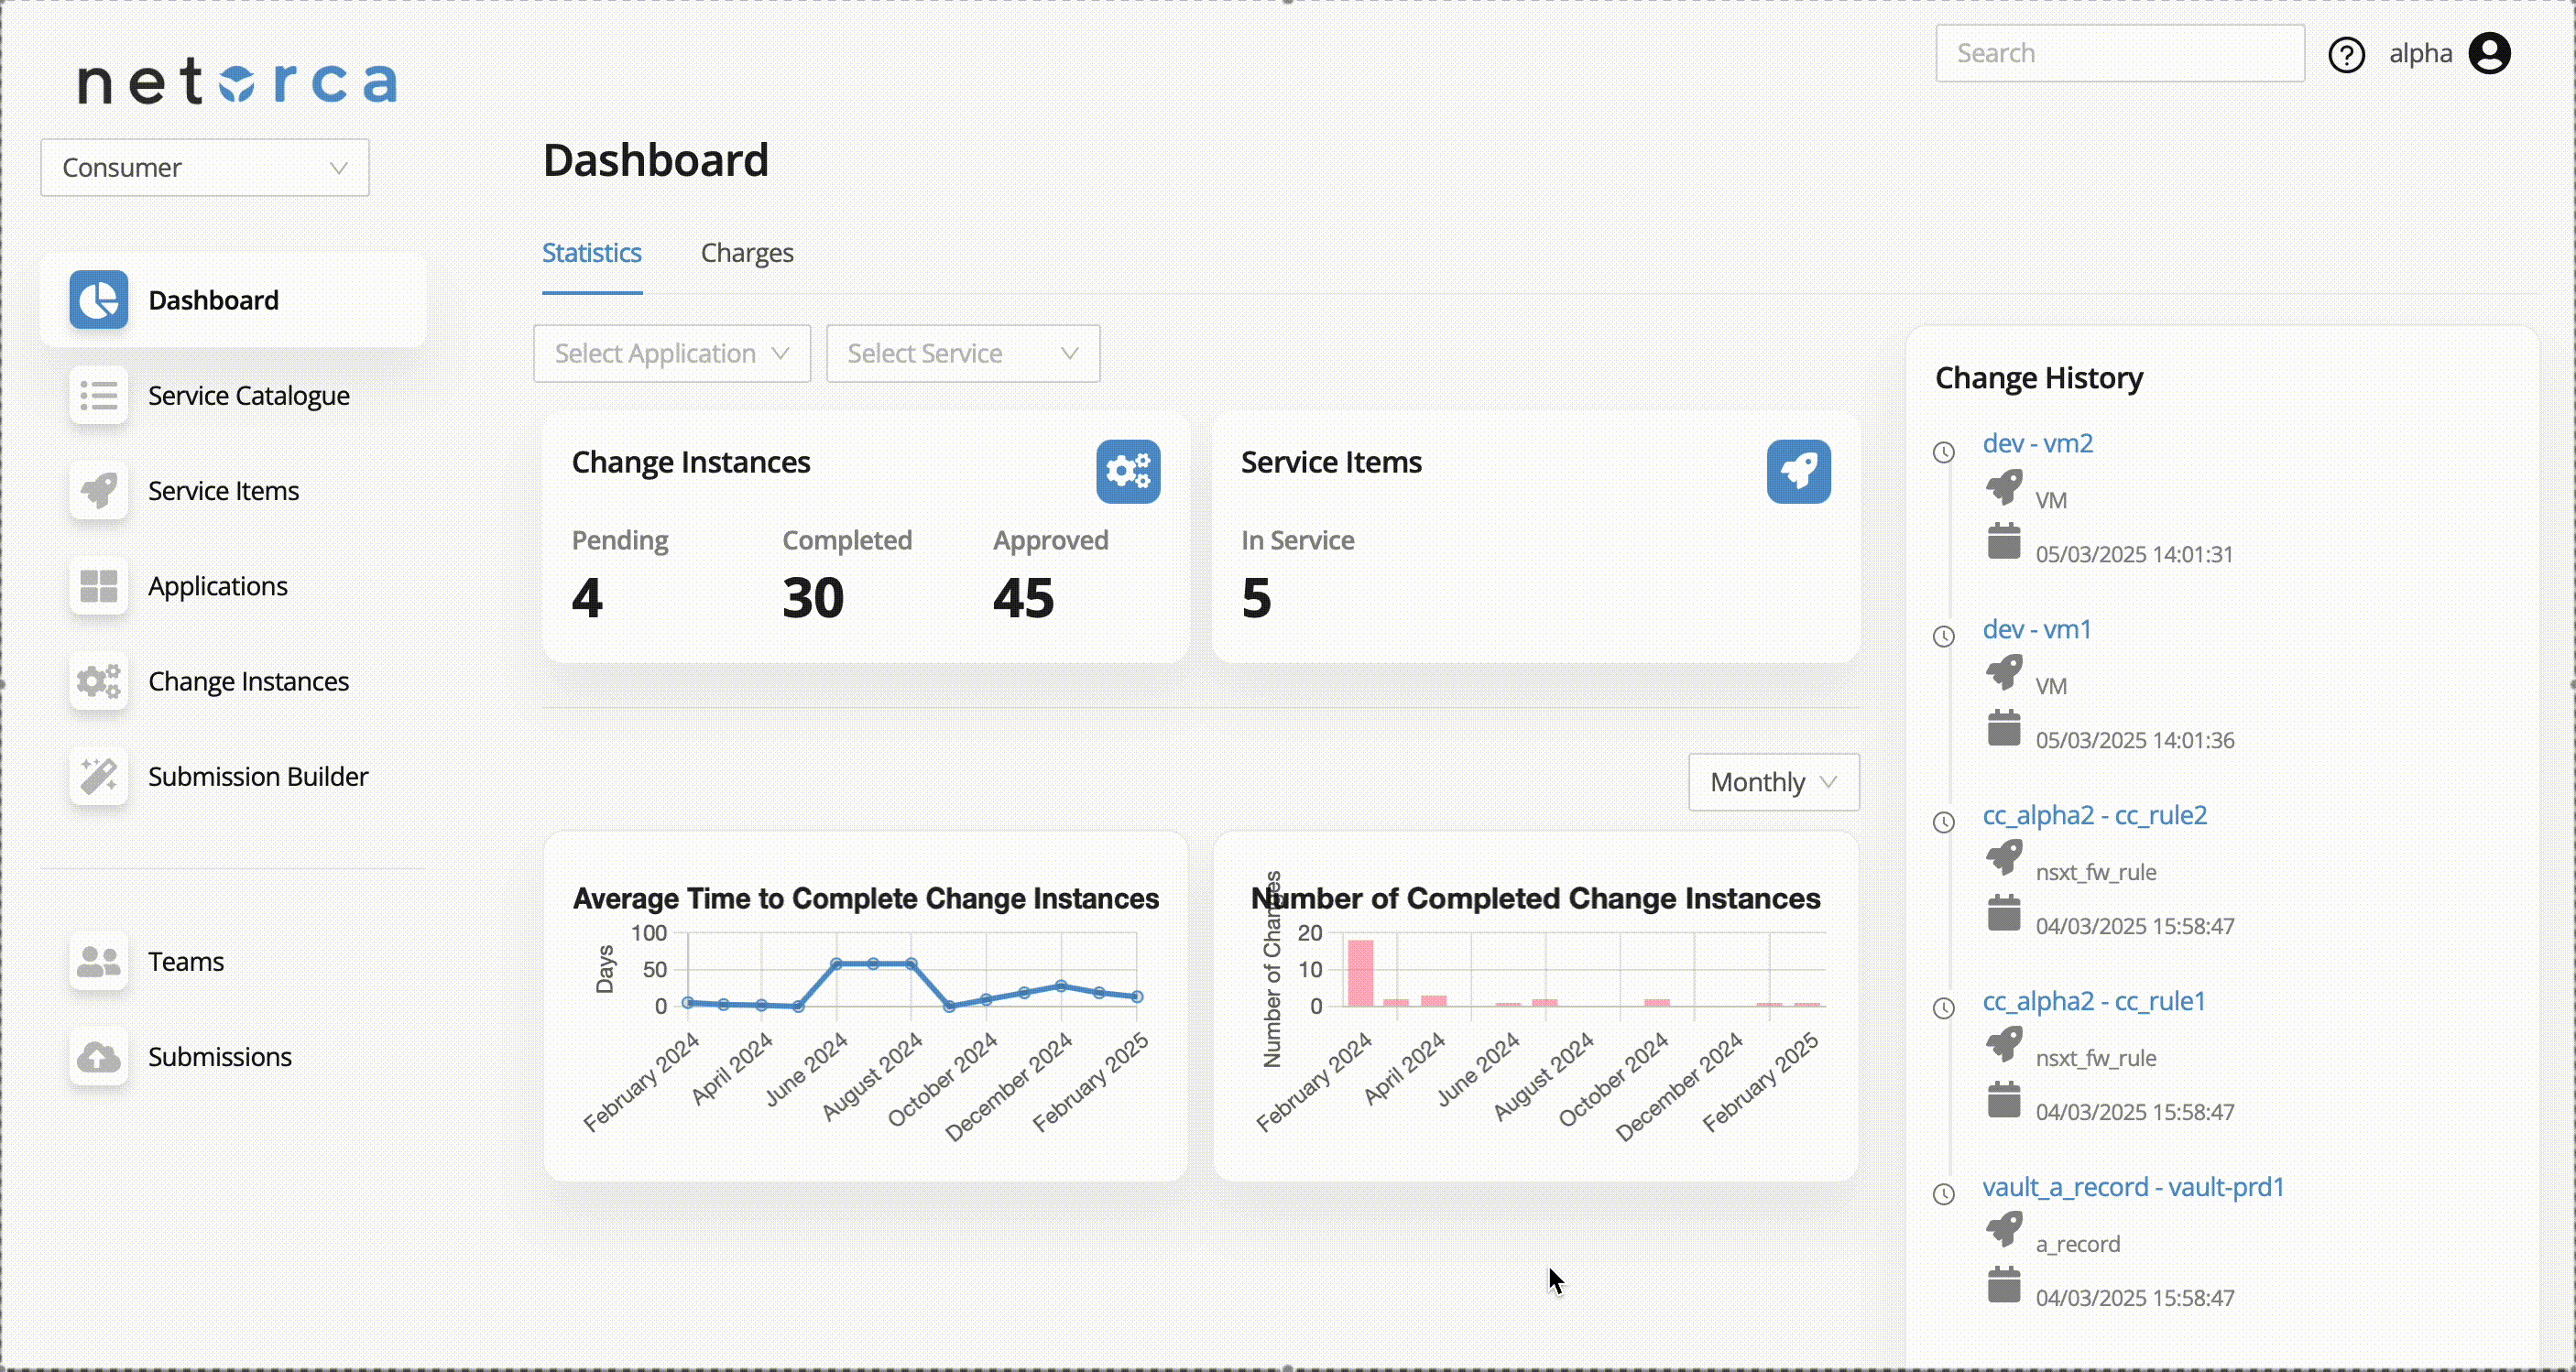
Consumer: Track Change Instances
Consumers can monitor the status of their Change Instances through the GUI:
Service Owner: Process Change Instances
Service Owners review each Change Instance, apply the requested changes to their infrastructure, and mark them as COMPLETED:
For details on how Change Instances are generated, see Change Instance Generation Logic.
Step 4: Update Resources
Whenever a consumer needs to modify their infrastructure -- adding a new resource, changing a configuration, or removing a service item -- they submit an updated full declaration. NetOrca detects the differences and generates new Change Instances for the Service Owner to process.
This declarative cycle ensures every change is tracked, auditable, and consistently processed.
Next Steps
| Topic | Description |
|---|---|
| Service Definition | Full schema specification and advanced features |
| Service Settings | Visibility, approval rules, and versioning |
| Submission | Declaration structure and options |
| NetOrca Pack | AI-powered automation |